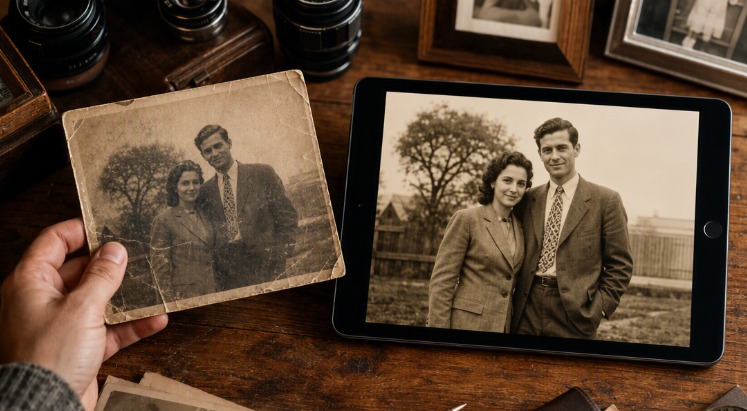
One of the most annoying things us taking an excellent picture, but when he checking the album later, finding that it was blurry. Under the influence of multiple factors such as hand shaking, slow autofocus and compressed files of social media applications, casual shooting with a weak focal length can be seen almost everywhere.
To be fair, if your photos have been completely blurred out and there are no details to speak of, then there is no tool in the world that can make details that do not exist out of thin air. But if the picture only has a slight dynamic shake or edge blur, it is surprisingly easy to save it.
There are three simple and intuitive ways to repair blurry photo materials on different devices without cumbersome and complicated advanced professional software settings.
Method 1: Fix Blurry Photos Online with BeautyPlus
Best for: Portraits, compressed social media shots, high-resolution upscaling (2x/4x), and batch processing up to 50 photos without downloading software.
For users seeking an effortless browser-based repair without downloading heavy software, BeautyPlus provides a versatile web suite. Its dedicated unblur image tool uses machine learning to intelligently calculate and reconstruct missing visual details while preserving the original photo’s structural integrity.
Beyond simple edge sharpening, the platform combines detail recovery with resolution upscaling (supporting 1x, 2x, and 4x enlarge options) to deliver HD-quality renders without stretching or pixel distortion. For higher volume projects, its batch interface lets you process up to 50 photographs simultaneously and export them in a single zipped folder. The web utility operates cleanly without display ads, adding no mandatory brand watermarks or logo overlays to your exported files.
How to use it:
- Head over to the online unblur image workspace on BeautyPlus.
- Drag and drop your target photo into the upload area (or select up to 50 files at once for batch processing).
- Choose your desired output scale—keep the native resolution or select 2x / 4x upscaling to simultaneously boost picture dimensions.
- Let the automated neural model detect focal loss and apply the deblurring pass.
- Preview the restored crispness and click Download to save your clean asset directly to your device.
Method 2: Fix Blurry Images with Nero AI
Best for: Occasional single-photo fixes for landscapes and general snapshots if you don’t mind logging in for a free trial.
Nero AI (ai.nero.com) is another web-based alternative that utilizes deep learning algorithms to correct camera shake and lens softness. It offers options like “Increase Detail” to automatically boost focal clarity on portraits and landscapes alike.
However, the primary drawback of Nero AI lies in its usage friction. Unlike fully open tools, Nero AI forces users into a mandatory login wall before rendering can even begin (“Sign in to start image processing…”). Free accounts face strict credit caps, slower queue times during processing, and paywall prompts when attempting to export high-resolution assets without a subscription.
How to use it:
- Open your browser and navigate to the Nero AI Image Unblur workshop page.
- Drag your blurry photograph into the upload area or click Upload Image.
- Toggle processing preferences like Increase Detail on the left menu panel.
- Click Fix Blur—a mandatory login pop-up will appear requiring you to sign in before the engine begins rendering.
- Once signed in and processed, inspect the preview and click Download to export your restored photo.
Method 3: Touch Up Soft Photos Natively on iOS and Android (Apple Photos / Google Photos)
Best for: On-the-go quick edits, offline privacy, and minor camera shake directly inside your phone’s default camera roll.
If most of your photos are taken with your mobile phone, you don’t have to download a third-party application to save a photo. Both Apple Photos (iOS/Mac) and Google Photos (Android) have built-in processing sliders, which can be run directly on the device hardware without uploading files to the cloud.
This built-in method is very suitable for daily mobile phone users, allowing them to instantly and cost-retouch the slightly out-of-focus casual photos before sharing. The “Definition/Unblur” tool is optimized for the mid-tone contrast to reveal the hidden structural lines; and the standard “Sharpness” control can tighten the peripheral edges of the blur and make the photos in the album look good in a few seconds. New.
How to use it:
- For iPhone/iPad (Apple Photos):
- Open the Photos app and select the blurry photograph you want to fix.
- Tap Edit in the top-right corner to access the adjustment panel.
- Locate Definition and drag the slider rightward to boost mid-tone clarity.
- Switch to Sharpness and pull the slider upward slightly to crisp up soft outer boundaries, then tap Done.
- For Android Devices (Google Photos):
- Open the Google Photos app and select your soft picture.
- Tap Edit at the bottom, then navigate to the Tools or Adjust tab.
- Select Unblur (available on supported Pixel devices) or choose Sharpen to recalculate edge definition.
- Drag the intensity slider until details look crisp, then tap Save copy to keep your original intact.
FAQ
Can AI tools fix photos that are completely out of focus?
Not really. If an image is blurred to the point where all visual details are erased, there is simply no pixel data left to recover. These algorithms perform best on light camera shake, minor focus drift, and heavy file compression.
Will unblurring an image drop its quality or shrink its pixel dimensions?
No. Modern recovery algorithms refine edge contrast without scaling down your resolution or cropping your original canvas size.
How does AI unblurring differ from standard manual sharpening?
Basic sharpening filters blindly boost contrast along every high-contrast edge across the photo, which often creates noise and harsh white outlines. AI unblurring contextually reads the visual scene, distinguishing actual subject textures (like hair, eyes, and typography) from background noise.
Final Thoughts
A photo can no longer be thrown directly into the trash can. Depending on your time available and preferred operating system, from lightweight browser tools to desktop editors, various tools can bring lost details back into a clear view. Quick testing of several schemes for fuzzy files is the ideal way to find the most suitable way for your retouching workflow.